This is where you're going to be spending the majority of your time. The majority of your work behind the desk will be checking items in and out--and staying attentive to anyone coming to the desk needing help. Reading books and doing homework is fine, just as long as you aren't missing or ignoring any patrons at the desk. We expect regular eye contact with patrons passing through so that you are seen as approachable to questions. Don't be like the guy in the picture above, standing right in front of you but invisible.
Work-studies are allowed minimal use of cell phones behind the desk. Laptops are allowed for school-related work with permission from your supervisor. A minimum amount of texting and social networking are allowed if no other work needs to be done immediately, but you may be asked to stop if you are doing them frequently.
Ferrum students and employees can check out any item that the library has to offer except magazines and reference books.
Community patrons, those who live in Franklin County but otherwise aren't connected with the college, are allowed to sign up for a Ferrum account with a photo ID. They can check out books but no other items. A librarian can create an account for them.
LOGGING INTO KOHA
Starting with the Fall 2022 semester, the library is using an online circulation system called Koha.
Instead of having a special icon the way our old system did, you can just go to it with a browser:
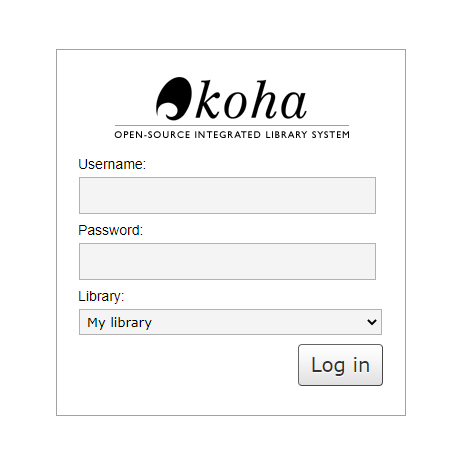
The login screen is pictured below.
The log-in information is the same as the old system: the user name is fecirc, and the password is felib.
Since the library no longer shares its circulation system with other schools, you can now bring up someone’s account by entering either their name, ID number, or email address. If you enter the patron by name, use the last name first. (And unlike the old system, if you use their ID, starting their ID number with fe is no longer necessary). However, the patron must still show you an ID in order to check out an item.
(Patrons must also be using their own card. Using someone else’s ID is not allowed unless that person is with them and giving permission.)
The check out tab appears on the left of the patron’s account page, under their personal information.
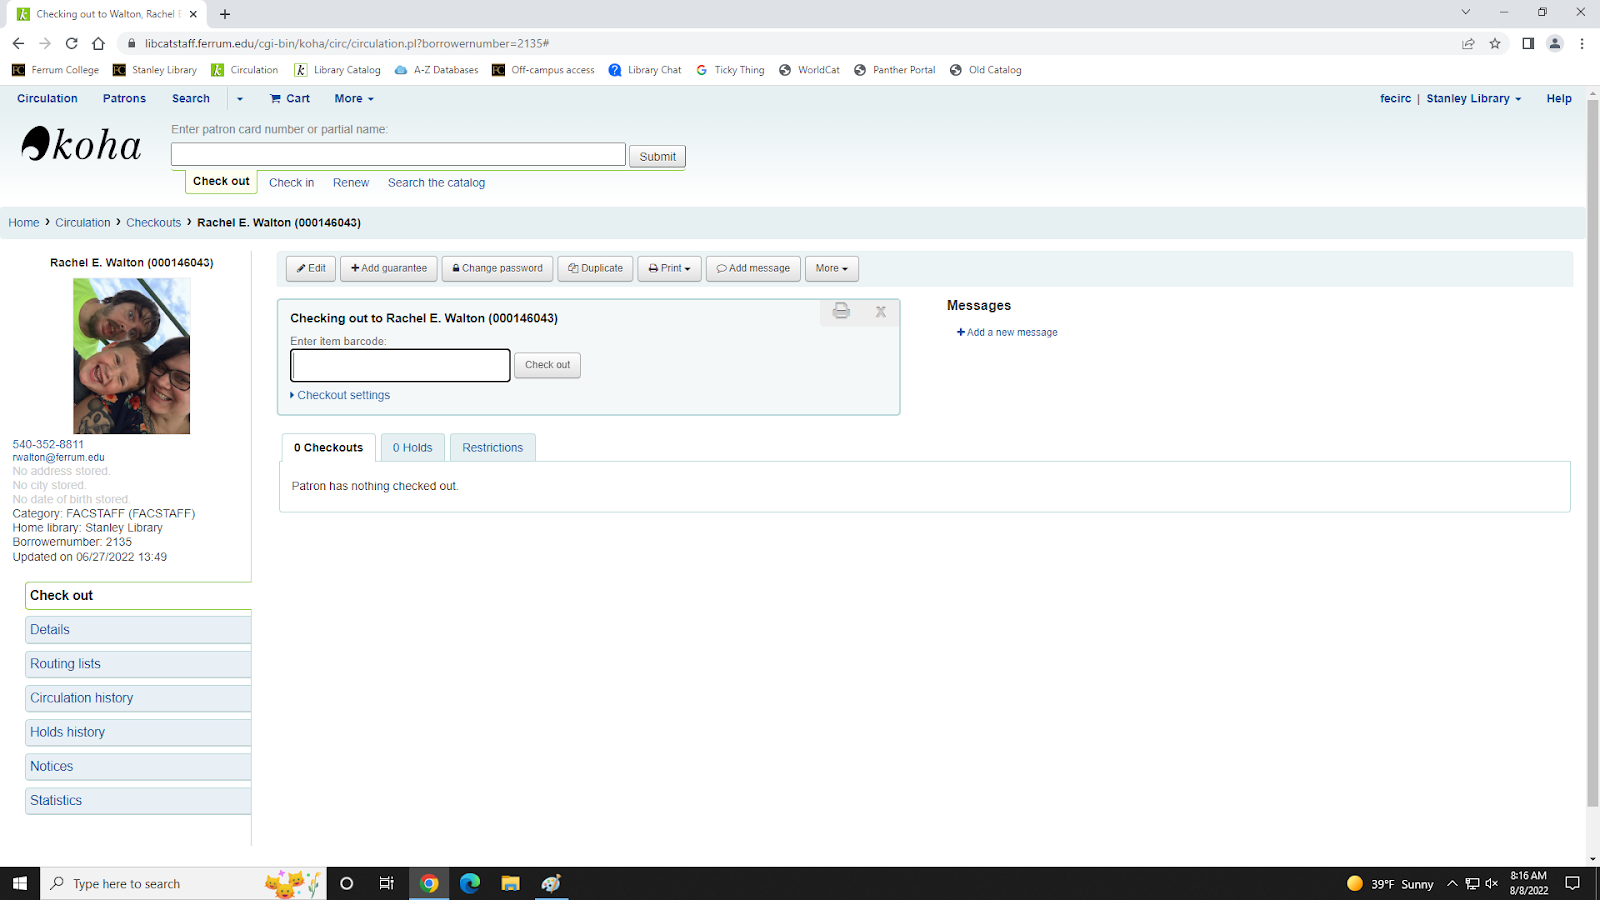
Item barcodes can still be scanned directly into the box. If the patron wishes to change the due date of an item, please see a staff member.
Items must be checked out, including reserves and keys. Occasionally a patron won’t want to check out a reserve item because they’re “just going to make copies from it”--a good rule of thumb is that if it crosses the desk it needs to be checked out. (The only exception to this is interlibrary loans–Rachel has already taken care of the check-out procedure for these.)
Desensitize the books. This is done with the sensitizer to the right of the circulation computer, with the button set to “Desensitize” to demagnetize the metal strips we place in the books to set off the door alarms. Run the spine along the bottom of the machine’s platform, and when you hear a thunk the book has been desensitized. You do not need to do this for reserve books, interlibrary loans books, or any item that is not a book.
Always let the patron know when items are due–the computer will tell you if you aren’t certain. Write the due date in the books on the date slip glued on the inside of the back cover, or the sheet bound around the front cover of reserve items. You don’t need to put a due date anywhere on interlibrary loan books or any item that is not a book.
Items cannot be checked out to a student or community patron who has a fine or an overdue item. Only staff can take fine payments. If no staff member is available, ask the patron to return later. The account page will give you a warning if the student has a fine or an overdue item. The items the patron has checked out along with their due dates can be seen by clicking the “Show Checkouts’ button at the bottom of the patron’s account page.
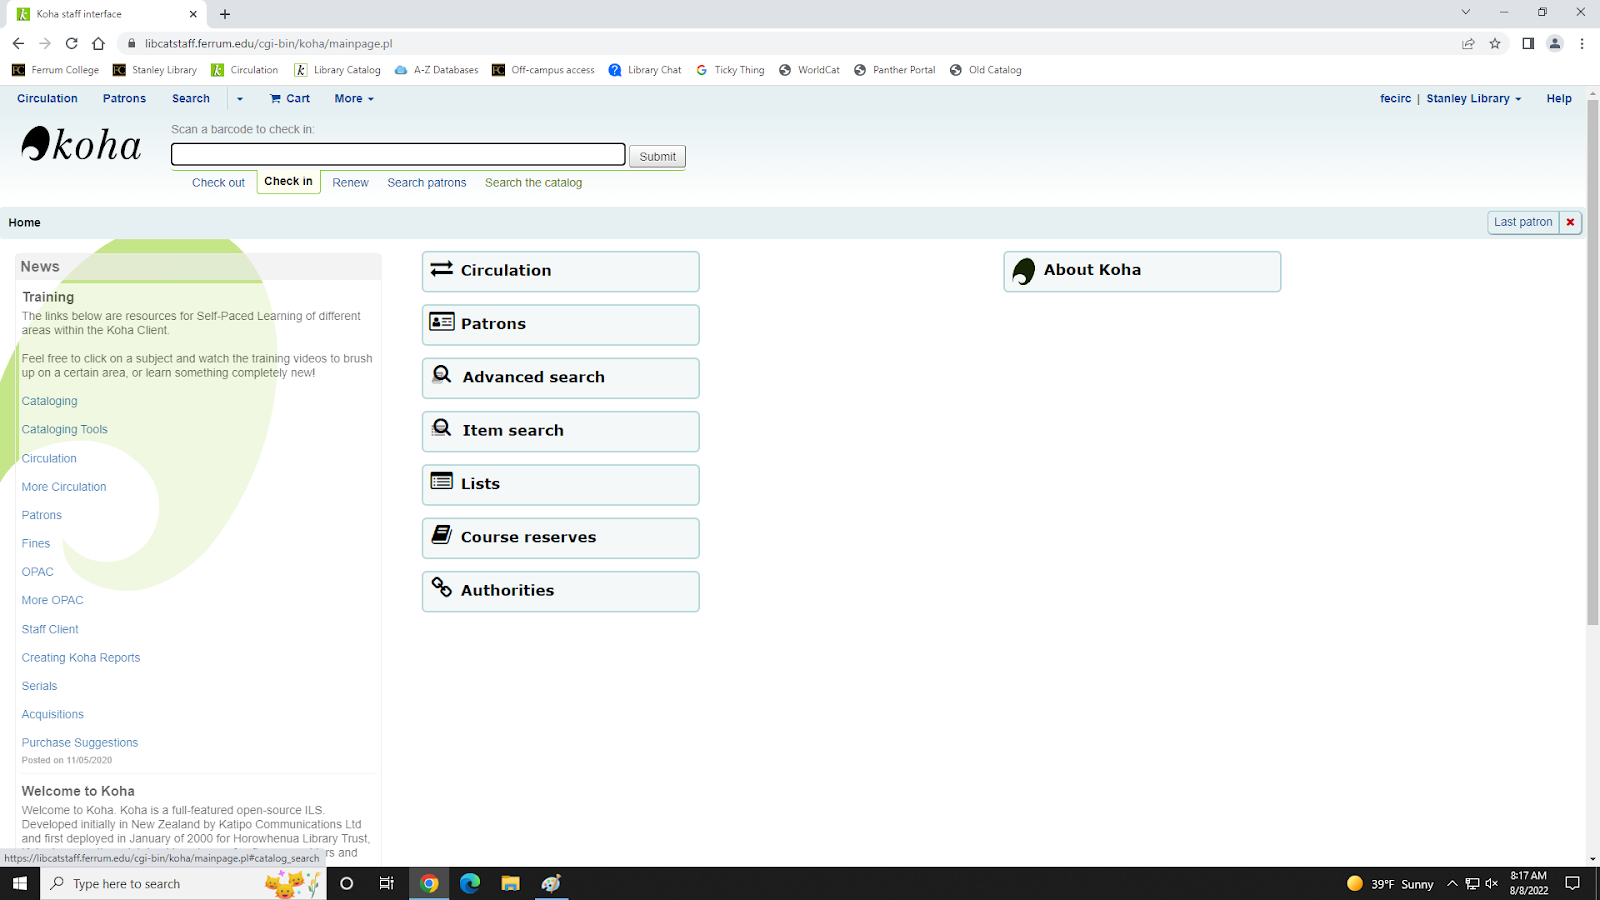
Items check in from the main circulation screen beneath the search box:
From there, the returned items can simply be scanned in. You don’t need an ID to check in items.
The first thing you'll notice about the Library of Congress catalog numbers is that they're a little more complicated than the Dewey Decimal numbers, which high schools typically use. Everything before the decimal point, however, can just be read alphanumerically. For instance, with the catalog number.
D57.C252
you'll simply look for D on the shelf first, then find where 57 would be.

Many people get confused after the decimal point, but it helps to think of this the same way you would in a math class. Like decimals in math, the catalog number has a tenths place, Hundredth place, thousandth place, and so forth. (Yes, some of the catalog decimal numbers do get longer than that.) Here is where the confusion can come in, a number like .C252 will come before a number like .C3.
The numbers aren't precisely numbers, but categories. The longer the number, the more specific the category. C2 would be a different category than C3 but in the same family as C252.
The way to determine which catalog number goes first is to go numerically just one decimal place at a time, thinking of them in a vertical row. For instance, starting with the tenths place and looking only at the tenths place.
D57.C252
D57.C3
You'll see that these two catalog numbers are in order that 2 would come before 3. If this still doesn't make sense, mentally add zeroes into the empty spaces the way you could for a math decimal:
D57.C252
D57.C300
The C3 above is the same as the C300, so it will come after C252.
And the checking-the-places rule holds true no matter how many decimal points you have. These two catalog numbers are in order top to bottom, which you can see by checking up to the thousandths place:
D57.C256879
D57.C257
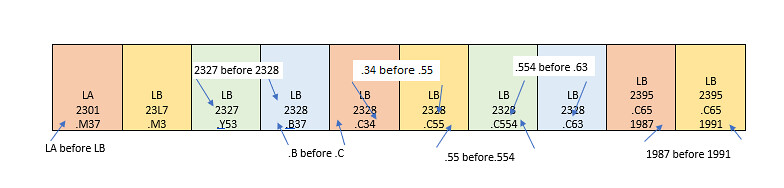
Occasionally the catalog number will include a year, specifying the edition of the book. In this case, a number without a year will always go before one with a year:
D57.C252
D57.C252 2001
(Again, if you have trouble remembering this, think of the blank space after the number as filled with zeroes--0000 would go before 2001).

The barcodes on the power supplies do not need to be scanned.
The Chromebooks, chargers, and cases all go as a unit: If someone wants one, they have to get and check out all three.
The iPads are currently considered a two-hour reserve.
When a student returns a Chromebook (with case and charger), they CAN NOT immediately check it back out. They can come back later in the day or the next day, but Chromebooks do not renew. We need to make sure we have enough for all students. If you are uncomfortable explaining that to a Patron, please ask one of the Library Staff and we will be more than happy to explain the policy.
We prefer games to be checked out, even if the students plan to play them in the library. This helps us keep track of how many times the game has been checked out. (There's no need to go over to someone playing one in the LEaP Studio and ask them to check it out.)
When checking the item in and out, the system will prompt you to check inside the game to make sure all of the game's items are still present. Look the items over before checking the game in or out.
Again, during the duration of the pandemic, no games will be available for check out.
Most audiovisual items will have other parts that don't check out separately, such as USB cables. A/V items include:
When checking in A/V items, please make sure the item is working properly first.
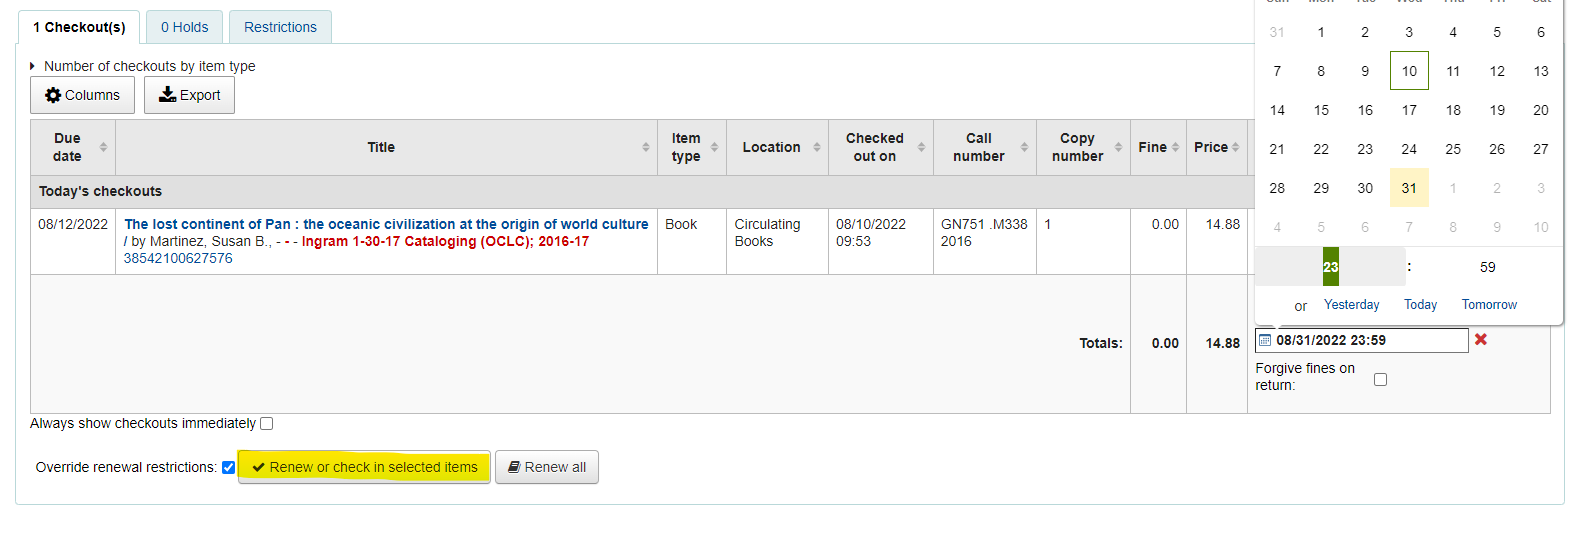
To renew an item you will need to verify the renewal with a member of staff depending on what the item is (book, DVD, chromebook) - it might be denied. First you will need to enter the patron’s ID information. Once the patron’s record is up (see example below) you will need to open the check out tab on the left side. Any items checked out to that patron will show up here.
Check the box to show all the patrons current check outs.
Once you have found the item or book you wish to renew you will need to check the box labeled ‘Override renewal restrictions.’.
You will then need to change the date, by clicking on the calendar logo to the right.
Select the new date. For this example we are going to use August 31, 2022.
If you are renewing the item on the due date, Koha will automatically change the due date, as shown below:
If you are renewing the item or book before its due date it will do something a little different. Koha will schedule the item or book for automatic renewal on it’s due date, and look something like this:
If anyone wants to renew an interlibrary loan, refer them to our Interlibrary Loan coordinator, Rachel Walton.
When anyone wants to put an item on reserve they must fill out a reserve form, which is available online. One form is required for each item. No items will be placed on reserve until the form is filled out. Items and printed forms (some faculty still print copies) left for reserve can be placed on Danny’s desk in the Public Services office.
Reserves will always have the professor’s name on a paper mounted across the front cover. Most will be 2-hour checkouts; there are also occasionally a few overnight reserves. The computer will tell you when the item is due back if you are uncertain.
Reserves are always reshelved first by the professor’s name, then by title.
If a professor wants to take a non-library item off of reserve, don’t just hand it over to them—it needs to be removed from the library catalog first. Ask a library staff member to do this. All reserves once they are checked in need to be handed off to a member of staff, reserves have a locked location for shelving.
Interlibrary Loans do not have to be checked out to the patron.
Interlibrary Loans will always have the patron's name on the front of them - usually on a book sleeve. These items have white book sleeves, unlike course reserves which have orange book sleeves.
Interlibrary Loans, until picked up by the patron, need to be housed in the circulation desk with the Reserves, this cabinet should be locked.
When an Interlibrary Loan item is returned, it can be placed on Rachel's desk in Technical Services or handed to Rachel. If Technical Services is closed for any reason, the Interlibrary Loan may be placed on Danny's desk in Public Services or handed to Danny or Sierra.
All books need to be shelved when they are returned.
The Stanley Library uses the alphanumeric Library of Congress system--you can learn this by training with the training materials provided by staff, and refer to the insert here in the manual if necessary.
Everyone is responsible for shelving. If you feel like people who work before you aren't doing enough shelving, talk to a supervisor.
Call numbers A-N are on the second-floor stacks, and P-Z call numbers are in the lower-level stacks.
Reference books will have a "Ref" before the catalog number and are all on the main floor near the service desk. Books with a "Juv" go in the children's section, which is along the wall leading to the elevator. Various special collections will start with an X--"XE" refers to the Nave upstairs, for example, while "XA" is Special Collections, and a lowercase 'q' refers to the oversized shelf along the back wall in the lower level stacks.
Students are allowed to look up library information, such as the location of a book or DVD. Otherwise, research assistance and reference chats should be referred to staff. If no staff member is available, give the patron Eric's business card, located on the service desk.
Answer the phone “Stanley Library, this is (your name), how may I help you?”, “Stanley Library, how can I help you?”, or something similar so long as it includes the library’s name. If you need assistance with the question let the caller know you are putting them on hold prior to doing so.
If patrons have a complaint, feel free to get a supervisor to speak with them.
 The library has two copier printers (plus a poster printer) on the main floor and one color copier/printer on the second floor.
Students must enter their ID they press print for their document. Students must either use a Student ID card to swipe at the printer to release their job or punch in a 0 and their six-digit ID number. (In the case of a rare five-digit ID number, start with two zeroes. Other older IDs will have seven-digit ID numbers starting with a 0; the 0 isn't part of the ID number. All campus IDs will be six digits starting with a number from 1-9.) They can release their print job from any of our printers.
Students receive $10 each semester for printing--black-and-white copies are 5 cents per page, color printing is 8 cents per page, and the poster printer charges $2 per linear foot. (A standard poster will be three feet long and thus cost $6.) If a student needs to put money on their print account, a supervisor can do that.
Check the printer paper when you arrive and before you leave. Fill the trays if they need paper. Paper is in the same closest as the electronics, or occasionally there will be a ream of paper on the Reserve Shelf.
The printers are all linked on the "Papercut" network. A job sent to one printer will appear on all of them, though only the Bizhub C368 will print color.
The color printer always defaults to color. You can change a color document to black and white in the print menu, or change the job to "Grayscale" on the printer itself.
Typically, this is caused by one of two things: either a network glitch or the student's print account is out of money.
If it's a glitch, wait a few moments; most will settle themselves. If it lasts longer than that, find of the staff.
A staff member can also help determine how much money the student has on their card; by using the Cashier program on the reference computer.
Refresh the display. Most of the time the, item will reappear, which usually means one of two things:
The student may not have enough left on their account to print. If that's the case, the printer may display a 0 dollar amount where the cost of the print job would be. Again, a staff member can check the student's account with Cashier.
More often, the format of the document was a paper size that the printer doesn't have. Sometimes the display will indicate this but not always. (And sometimes the printer still says "LTR" for Letter / 8 1/2 x 11 even when the paper size is slightly different.) The way to fix this is to go back to the print menu and force the computer to send the document as 8 1/2 x 11. To do this, go to Printer Properties, select the Paper/Output tab, the Paper drop-down menu, click "Other Size," and then choose 8 1/2 x 11.
This is a common problem with photos, PDFs, and the like. Look at the bottom of the print menu and see if there's a link that says "Print using system dialogue" or something similar. Click that, then Printer Preferences. From there, the student can do the standard color print process of going to Image Options and unchecking Print in Black and White. Once that's done, the item will be ready to print.
Turn off the main power switch, the one hidden behind the front cover. Wait a moment, then turn the printer back on.
When someone calls or visits the desk to ask for their off-campus login, you can help them by following these steps:
Verify the person’s identity by asking for an ID number. Do not give out ID numbers.
Only someone with a campus ID will be able to use an off-campus login.
To login with PORTAL username and password for off-campus access:
Old Instructions/login page: if anyone ends up on the old login page:
To log into the library’s research databases from outside the Ferrum server, you will need your Ferrum ID card.
Your username will be first name <space> last name as it appears on your student ID card. Your password will be fe followed by your ID number, OMITTING THE FINAL DIGIT if you have replaced your ID card in the past. All passwords are nine digits in length. If your card number is less than nine digits, precede your id number with zeros until you get to nine numeric digits.
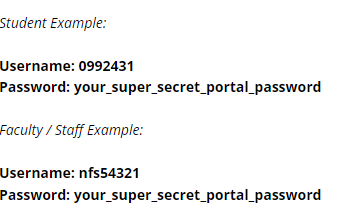
For example, if this were your ID card, you would sign in with:
USERNAME: donald livingston
PASSWORD: fe000012345
The library staff does not take reservations for library classrooms. These are handled through Conferences & Events (X4474), and an online reservation form is available through Panther Portal. Danny can check whether or not a library room has been reserved and to who.
The LEaP Studio is for library instruction and other related gatherings. Reservations for it must be approved by Eric.
Reservations for the Digital Media Center, the study rooms (306, 307, and 308), and the Green Screen room are through the library webpage. Groups with reservations will always be given preference.
Some reservations are allowed during times when the library is closed. However, if anyone asks about this, let them know that while the building itself may be available, there will not be any library staff available to assist them.
People often leave their items in the library when they leave the building, and now and then, they'll ask us if we can keep an eye on their stuff. We've allowed this in the past when they brought their items to the desk, but now, tell them we can no longer do it. Aside from possible liability and fraud issues, even if someone brings an item to the desk you may have to leave the desk. There's no need to make yourself responsible for their items.